
You can click on my screen shots to make them larger.
This tutorial was written by me on June 14, 2009. It is my own idea and any similarities to another tutorial are purely coincidental. Please do not copy and paste it anywhere online. You may link to my blog for groups.
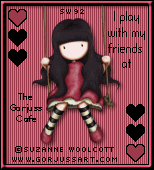
For this tutorial, I am using the awesome artwork of Suzanne Woolcott.
You can purchase it at her store. Please DO NOT use the same without a
license!
Scrap kit from Jessica. If is available HERE. This kit has been
around for a little while but it's just beautiful!
Tube and font of choice. I used SnootyFox NF, which I can't supply.
Eye Candy 4000 - Gradient glow.
Open a 600x600 image. Flood fill white so you can see what you're doing.
Open Frame3 from the kit. Copy and paste it onto your canvas. Click
inside it with you magic wand. Selections, modify and expand by 5.
Open a paper of choice. I used Paper 24. Copy and paste on top of your frame layer. Selections, invert and hit delete on your keyboard. Drag the paper layer under your frame layer in your layer palette. Selections, select none.
Copy and paste your tube of choice. Duplicate it and move it down
under your frame.
Click inside the frame again with your magic wand. Selections, modify
but by 3 this time. Selections, invert and make your top tube layer
active. Use your eraser brush to erase whatever part of the tube is
outside your selection. Don't worry...with the selection there, it
won't let you erase too much!
Add a drop shadow to your BOTTOM tube and your frame. If you
dropshadow the tubethat you erased from, you will be able to tell you
deleted!
At this time, I hid my bottom layer and went to merge, merge visible.
This way it won't resize the bottom layer! Image, resize by 80%, all
layers UNCHECKED. Now you should have something like this

New you can add your embellishments of choice. I used the
fairydusttrail_JD. Paste as a new layer. Duplicate, Image mirror and
image flip. Merge those 2 layers together and drag it down underneath
your merged layer.
Add the SF Wordart. I gave this a fat gradient glow with a color from my tube with these settings:


New, paste the flower branch1 and resize by 60%, all layers unchecked.
Image, flip and move it so there's just a little showing at the bottom.
Right click on that layer in your layer palette and duplicate, mirror.
Merge the 2 layers together and drag it down under the sparkle trail
layer.
You can no merge visible again, but make sure your bottom layer is
hidden. Image, resize and resize by 80% all layers UNCHECKED.
Add your copyright and your name. I added gradient glow to my name but
size 3.
You can now crop your tag to get rid of the excess white.
If you want a transparent background, keep your white layer hidden and
save as a PNG. Thanks for trying my tutorial!
♥


No comments:
Post a Comment