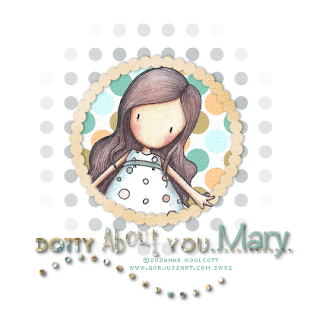
This tutorial was written by me on May 19, 2008. Any similarities to another tutorial online are purely coincidental. Please don't copy and paste my tutorial anywhere or claim it as your own. You may text link to my blog so that others can do it.
What you will need for this tutorial:
Tube of choice. I am using one of Suzanne Woolcott's awesome art. I bought this when she was with AMI and have since transferred my license over to her site. Please do not use the same without the proper license. Her tubes are available at her store now.
Template #9 by Rachel. You can download it HERE and don't forget to say thank you!
Scrap kit of choice or the free to use one that I used called Early Morning by Sentimental Style. You can download all of her wonderful kits HERE on her blog. Make sure you leave her some love!
Font of choice. I am using ZiptyDo.
I am not including screen shots with this tutorial as it's pretty easy. If you have any questions, you can always contact me HERE.
Open your template and shiftD to duplicate it and close the original. Close or delete the very top copyright layer. Close the circle stitches layer.
Click on your circle layer to make it active. Selections, select all, selections, float, selections defloat. Copy a paper from the kit and paste as a new layer. I used Paper1. Selections invert and hit delete on your keyboard. But do not deselect yet.
Open your tube of choice and resize it. I resized to 60% bicubic. Drop shadow your tube. Copy and paste the tube as a new layer on top of your paper.Use your eraser tool to remove the part of the tube that is outside of your paper layer. Don't worry about being too neat as it will only erase to where the selection line is. Don't forget the little part of her finger that's hanging over the selection, if you placed your tube like I have. Selections select none.
Now choose your small scalloped frame layer. Selections, select all. Selections, float and then selections, defloat. Copy and paste a paper of choice. I used Paper 4. Selections invert and hit delete.
We're almost done!
Choose your dots layer. Selections, select all. Selections float. Copy and paste a paper of choice. I used paper 5. selections, invert and hit delete. Selections, select none.
Click on the circle stitches layer in your layer palette and drag it so it's under Raster 2 in your layer palette, which should be your tube.
Make the Word Art layer active. Choose a color from your tube or use a paper. The easy way to do it with a color is this: Make a new layer above your word art and flood fill it with your color of choice. Higlight your word art layer and go to selections, select all selections, float and then defloat and then make the layer active that you filled with the color and go to selections invert and hit delete.
Now you can go back through and delete the layers of the template, except leave the circle stitches if you want those on your tag!!
Go back through and add a drop shadow of choice to the layers, but remember, we already shadowed the tube!
Add your text and copyright information. Hide the white background layer and save as a .png if you want it to be transparent.
Thanks for trying my tut!


No comments:
Post a Comment