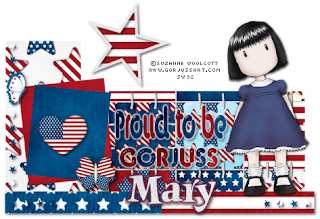
This tutorial was written by me on June 28, 2009. It is entirely my own idea and any similarities to any other tutorial is purely coincidental.
What you will need: Scrap kit of choice, preferrably Red White & Blue. I am using the gorgeous FTU kit by Monti. You can find it at her site HERE. Click the bears to enter the site and then click on Scrap Kits. It's called BigBangBoom-BlogTrain-Kit.
Template: I am using template 3 by Stayyseee Productionzz. You can find that HERE.
Tube and font of choice. I am using the adorable artwork of Suzanne Woolcott. You can find it at her store HERE. Please do not use the same tube without a valid PURCHASED license.
My word art or make your own. I have posted mine here. It is saved as a png with a transparent background. Right click to save it to your computer.
Ok Let's go.
Open your template. ShiftD to duplicate it and close the original. Image resize, and resize 80% Bicubic. Delete the top layer. Click on the layer called Dark Gray Rectangle to make it active in your layer palette. Selections, select all, selections float and paste a paper of choice. I used the Patchwork paper. Copy and paste onto your canvas. Selections, invert and hit delete on your keyboard. Selections, select none. You can now either delete the original layer or close the eye to hide it.
Go to the next layer up and repeat the steps as before. I used StarsNStripes-White. Keep repeating all of that until you have your layers covered with a paper.
For the white square, I used the Red Paper
For the black square, I used the blue paper.
For the white stars layer, I used the blue paper with the stars on it.
I also used the same paper on BOTH of the black stars layers.
The next layer is the Gray Star. Selections, select all, selections float, defloat. Open up the Stripes1 paper, but resized it to 60%. Copy and paste it on top of your selected star.Selections invert and hit delete. Make sure when you close that paper that you click NO when it asks if you want to save the changes to it!
On the star frame, I used the white paper.
Unhide the Gray Stripe layer, and add a paper of choice to it. I used the Flag paper and moved it up so the stars were showing in my selection before I did the selection, invert, selection delete.
I then added the heart out of the kit, resized 30% SMART SIZE and then 50% smart size. Place it over on your blue square.
Add any other pieces from the scrap kit that you want. I used a couple of butterflies, resized as above.
Go back through and give each layer a drop shadow. I am using V&H 2, Opacity 55 Blur 5.
Here's what mine looks like so far:
Next add your tube of choice. I resized mine 60% BICUBIC. Place where you like and add a drop shadow. I used 1, 1, 100, 5 to make her stand out a little bit.
For the text, I put the blue and white papers in my foreground and background and typed each letter in a different color. Takes a little bit of time but it's not hard to do. I have included my text layer. You can get it above.
Add your name in a font of choice. I used A&S Jiggy Roman, which is a pay font so I can't supply it. I also used the white paper in the background and foreground null. Add a drop shadow and a gradient glow. I used both the red and blue from the papers for the glow.
Use your crop tool to get rid of the excess. If you resized at the beginnins, you shouldn't need to resize again. Add your copyright. Make sure it's legible. I a small white gradient glow using EyeCandy 4000 to make it stand out.
Hide your white background and save as a png.
Thanks for trying my tut. I hope you found it easy to follow.
No comments:
Post a Comment